


I’ve made a couple of cards using the Tulip Fields stamp/die bundle but today’s card shows off some of the other dies I hadn’t tried yet. You can see my other Tulip Fields card Here.

The Windmill elements
The large windmill die, while easy to crop can be a bit overwhelming but I really wanted it to be thee star of my card today. The pieces are cropped using Crumb Cake and Soft Suede then adhered with liquid glue. The paddles can be attached with a brad so that they spin but I wasn’t looking for that today so I used only a glue dot and a black matte dot.

FLOWERING FIELDS 12” X 12” (30.5 X 30.5 CM) DESIGNER SERIES PAPER
The real star of the show however, is the background piece of Flowering Fields Designer Series Paper. You can see in the image above which design I used. I started off with a piece cut to the standard size of 4 x 5-1/4 but it didn’t seem right so I took more and more off the top until the final size of 3-1/4 x 5-1/4.
Mind you, I had no idea how the final card was going to end up, just that I wanted a bicycle, tulips, fence windmill and tree. To create the field of tulips I used the die included in the bundle and cropped them from Cherry Cobbler, Real Red, and Poppy Parade. A little liquid glue to hold them together from light to dark and it looks like a field of tulips.

WINDMILL FIELDS DIES
Everything was glued down on my background paper but I still hadn’t decided on what type of cardbase to use. White was the best choice as it wouldn’t fight with the other elements but it needed some type of layer inbetween. I grab my plastic sleeve full of scrap pieces of black cardstock and pull out a previously die cut piece from Scallopped Contours. I felt it reallly added something to my card front and tied in the black bicycle. You never know when you’ll need something you previously prepapred then tossed aside.

Thanks for visiting my little portion of the Internet today. Click the button below to shop my online Stampin’ UP! store 24/7. If you have any questions, drop me an email at [email protected].
Buy Awesome StuffHappy Stamping
Lynn
If you enjoyed this post please be sure to…
- Check out my Gallery of Projects for more inspiration
- Save 10% on Product Bundles
- Check out the Clearance Rack and save up to 70%
- The $99 starter Kit is the Best Deal of ALL. Discounts & benefits Here
- Sign up for my Newsletter for information on Sales, classes, and Specials
Current Specials

JOINING DURING SALE-A-BRATION

Are you looking to get a great deal on Stampin’ UP products as well as a 20% discount on future purchases? Consider joining Stampin’ UP! and my team today. During Jan-Feb if you sign up as a Stampin’ Up! demonstrator during Sale-A-Bration, you’ll be able to pick two additional stamp sets for free after picking all of the products you want in your Starter Kit. The stamp sets need to be live at the time of picking them, so anything you see in a current catalog or at stampinup.com is eligible.
Answering Your Joining SU QuestionsChange My Life – Join Now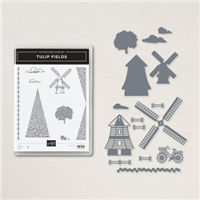


What a wonderful card!!
Thank you so much Jackie!
Love your creative take on this set!
Thanks so much Rachel. 😊