When I made the card I’m featuring today using the Rustic Harvest suite the products were available for purchase. Sadly they are not right now, but they will be back to orderable status in September and that’s a great thing. I decided to go ahead and share this card, mostly because I love it, but also because it uses a fun technique I haven’t used in many years and can be used on various projects.

The Rustic Harvest Designer Series Paper has lovely colors on one side and black and white designs on the other. I find it fun to mix black and white with just a pop of color and this project fits the bill. The card base is black cardstock with a piece of white (4 x 4-1/4) overstamped in black using the leaf from Rustic Pumpkin.

RUSTIC HARVEST 12″ X 12″ (30.5 X 30.5 CM) DESIGNER SERIES PAPER
$12.00
Next, I have a simple design from the DSP pack overlayed with a window frame I made using the Deckled Rectangle dies. Cut a piece of cardstock to 5-1/4 x 3 and use the 2nd smallest rectangle to make three windows. Adhere to your DSP with liquid glue.

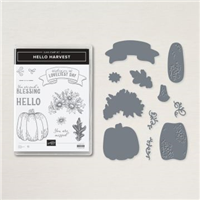
HELLO HARVEST BUNDLE (ENGLISH)
BUNDLED SAVINGS
$49.50
The white pumpkin with the flowers on top was easily made using the two embossed pumpkin shapes and layered atop each other. Use white embossing powder on black to create the flowers.
Let’s talk about that pumpkin

Now, how about that pretty pumpkin? I love the color of it and how it pops on my card front. Here’s how I created it.
- stamp the pumpkin using Early Espresso Ink onto Soft Suede cardstock.
- Quickly powder it with clear embossing powder and heat to set. NOTE – you can do this with any Stampin’ UP! ink.
- The fun part – get yourself some bleach from your laundry room. Yup, straight bleach, and a small paintbrush. Brush the bleach over the pumpkin and watch the magic happen. This technique can be used with lots of colored cardstock, each with varying results. I tried it on Crumb Cake and it turned out very pale yellow. Pretty but not what I wanted for my pumpkin.
- Die cut the pumpkin along with some green swirly bits and the green leaf.
- After your card is fully assembled add some Glossy Accents (not a current SU product but available on Amazon or big box craft stores) to the shaded areas for the final touch.

Thanks for visiting my little portion of the Internet today. Click the button below to shop my online Stampin’ UP! store 24/7. If you have any questions, drop me an email at [email protected].
Buy Awesome StuffHappy Stamping
Lynn
If you enjoyed this post please be sure to…
- Check out my Gallery of Projects for more inspiration
- Save 10% on Product Bundles
- Check out the Clearance Rack and save up to 70%
- The $99 starter Kit is the Best Deal of ALL. Discounts & benefits Here
- Sign up for my Newsletter for information on Sales, classes, and Specials
Current Specials