


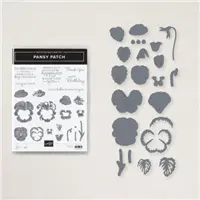
There are lots of stamp sets in my craft room that I haven’t pulled out in a long long time. One of those is Pansy Patch, and what a shame it has been neglected. Remedying that today though.

The Pansy Patch stamp/die bundle is always 10%, but during March it is 20% off. That’s significant savings. This is all part of the Savings in Bloom promotion going on, you can see full details below. I just thought it was time to use this stamp and die bundle before new products start arriving in my craft room from the upcoming new annual catalog. Lots more to come on that.

Step by Step
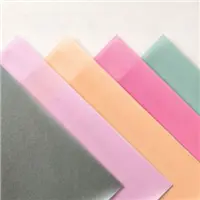
Polished Pink, Green, White, & Gold make a lovely combination. I used a standard card base of 5-1/2 x 8-1/2 scored at 4-1/4 in Polished Pink. I stamped some of the pansies inside images around the edges of the card base also in Polished Pink Ink.

Do you like how the gold foil peeks out on the sides? It measures 4-1/8 wide x 4 tall. The basic white panel is 4-3/4 x 3-3/4. Stamp the large pansy flower using Blushing Bride then use Polished Pink for the inside and do the same for the small pansy flower but on a scrap piece of white so you can crop it with the dies.
Crop all three pieces of the pansy bud from white cardstock then color them using a sponge dauber or blending brush using polished pink and old olive.
For the stems and leaves, I used Old Olive and Mossy Meadow ink. I stamped the large pansy first, then stamped the stems so I could get better placement.

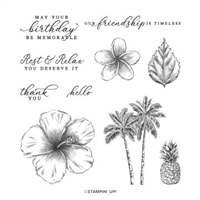
Another stamp set I have neglected is Timeless Tropical. I thought the Thank You sentiment was perfect for this card. I stamped in Mossy Meadow and cropped it with my 1-1/2″ circle punch (retired) but I could have used the Layering Circles as I used them anyway to crop the Shimmer In-Color Polished Pink vellum for the layer underneath.
Final touches
I stated at the beginning that Gold and Pink are lovely together. I used the Gold Glitter Enamel Dots (retired) because they were handy but the Metallic Dots or Gilded Gems would also have worked.
Lastly, I used a strand of the Simply Elegant Gold Trim and tucked it under the sentiment with a glue dot.
Thanks for visiting my little portion of the Internet today. Click the button below to shop my online Stampin’ UP! store 24/7. If you have any questions, drop me an email at [email protected].
Buy Awesome StuffHappy Stamping
Lynn
If you enjoyed this post please be sure to…
- Check out my Gallery of Projects for more inspiration
- Save 10% on Product Bundles
- Check out the Clearance Rack and save up to 70%
- The $99 starter Kit is the Best Deal of ALL. Discounts & benefits Here
- Sign up for my Newsletter for information on Sales, classes, and Specials
Current Specials


I love how you used the pansy and added just bits of the gold. This plan would also work well with other flowers. Thank you for sharing!
So easy to swap other flowers in this layout, for sure. Thanks Ann