Hello to everyone out in the world. I have had a lot going on the last week and have not been able to post as I should, but I hope to make that up to you in today’s Witty Wednesday Technique.


First of all, it was Mother’s day this past weekend and my daughters came over and we had a lovely lunch of crispy Polenta with various yummy toppings, and a light salad. Then it was an in-home spa day with facials, eyebrow lifts, hand massages, toenail painting, and more. My two older granddaughters (9 and 12) helped too. So fun and relaxing. This is a picture of my basket filled with slippers, a robe, and all my spa treatments.

Then I came down with a chest cold and have been on the couch for a few days not feeling like doing anything but today my energy was back and I made it to my craft room and tried some witty techniques I learned from Stampin’ UP! employee and demonstrator Shannon West. You can find Shannon on YouTube. Subscribe to her channel to see all her videos where she shares techniques and products and her awesome personality.
Today’s card is a little handmade envelope with flowers poking out. Shannon shared how to make this little envelope to add to the front of your card and it was too cute not to try. You can see Shannon’s Video here.

Steps and techniques
- Starry Sky card base 5-1/2 x 8-1/2 scored at 4-1/4
- Basic White cardstock 5 x 3-3/4 and embossed with the brick 3D embossing folder. Use the Ink to folder technique and apply a Smoky Slate ink pad to one side of the embossing folder before running it through your embossing machine to achieve the colored brick look.
- Create a mini envelope technique. Cut a piece of Designer Series Paper 4 x 4 for the envelope and also cut a piece of scrap cardstock to 2-1/2 x 1-1/2. Place the scrap piece of paper in the center of the 4×4 on the diagonal and adhere lightly with some tape runner. Pull out your paper trimmer or scoreboard to score the DSP along the outside edges of the small piece of cardstock. Trim out the small triangles and fold the sides and bottom to create your envelope.
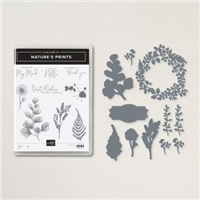
- Fill your envelope with whatever goodies you have on hand. I used leftover die-cut pieces from a previous project but any greenery or floral images would work.
- Stamp My Friend sentiment from Hello Ladybug on white and crop with the tag from Tea Boutique die set. Adhere to the front of the envelope as shown and attach a short piece of baker’s twine.

Thanks for visiting my little portion of the Internet today. Click the button below to shop my online Stampin’ UP! store 24/7. If you have any questions, drop me an email at [email protected].
Buy Awesome StuffHappy Stamping
Lynn
If you enjoyed this post please be sure to…
- Check out my Gallery of Projects for more inspiration
- Save 10% on Product Bundles
- Check out the Clearance Rack and save up to 70%
- The $99 starter Kit is the Best Deal of ALL. Discounts & benefits Here
- Sign up for my Newsletter for information on Sales, classes, and Specials
Current Specials