We have an apple tree right beside the house that has been just full of apples this year. We don’t eat the apples, but the deer love them. This year there have been deer under our apple tree just about every day eating up their delicious treat and that is what inspired my Peaceful Deer card today.

My card doesn’t look overly complicated but there are a lot of details going on here so let me break it down for you.
Ric-Rac Step by Step
- The finished size of this card is 4-3/4 x 3-3/4. I didn’t start out to make an off sized card but sometimes it just happenes. Cut the card base of Cherry cobbler to 7-1/2 x 4-3/4 and score a 3-3/4.
- Basic white cut to 4-3/4 x 3-1/4. Place the two rick-rack dies from Knit Together on each long side and run through your die cutting machine.
- On a large piece of basic black use the same rick-rack dies and cut two. Use the cut out portion and nest inside the basic white.
- Adhere to card base with tape or liquid glue.


Peaceful Deer assembly step by step
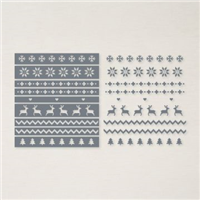
- Stamp the two tree images from Peaceful Deer on basic white with Tuxedo black Mememto Ink. Stamp once full strength then repeat without re-inking on either side.
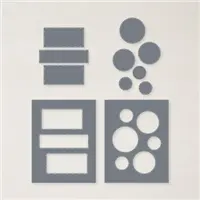
- Using Memento ink stamp the sentiment on basic white then crop with 1-1/8 inch circle die from layering circles. Crop the stitched circles from Picture this out of Cherry Cobbler and use medium size circle as background layer for sentiment. Adhere sentiment to layer with tape and then with dimensional to card front.
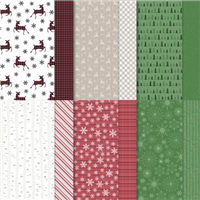
- Pull out the piece of Peaceful Prints DSP (free with $50 purchase during Sale-a-bration now through Sept 30) with the red and blacked checked deer. Use the Deer Builder punch to crop the deer with the head to the left. This is the easy one as the image is designed to be cropped with the punch.
- To punch out the deer facing the other way, turn the DSP over and using a light box or a window – anything to shine light from below even the flashlight from your phone- locate the deer through the paper. From the back side, the deer will line up with the punch. Use a pen and mark the back side of the DSP around the head and legs of the deer, just enough that you can see the marks when inserted into your punch. The punch should result in a deer with a head on the right and a white border all around. Adhere deer with dimensionals.


Thanks for visiting my little portion of the Internet today. Click the button below to shop my online Stampin’ UP! store 24/7. If you have any questions, drop me an email at [email protected].
Buy Awesome StuffHappy Stamping
Lynn
If you enjoyed this post please be sure to…
- Check out my Gallery of Projects for more inspiration
- Save 10% on Product Bundles
- Check out the Clearance Rack and save up to 70%
- The $99 starter Kit is the Best Deal of ALL. Discounts & benefits Here
- Sign up for my Newsletter for information on Sales, classes, and Specials
Current Specials