


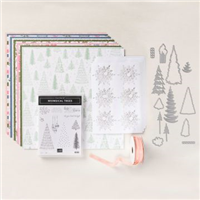
One of my favorite things to do is make Holiday cards in non-traditional colors. The new Whimsy & Wonder Suite that includes the Whimsy & Wonder Designer Series Paper and Whimsical Trees Bundle certainly lends itself to that. My card today only has a bit of stamping, the rest I’ve pulled from the oh so cute Designer Series Paper. Let’s take a look.

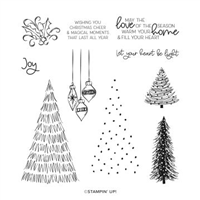
The gifts and two of the trees were cropped straight from the DSP, with the fancy overlay die cuts from plain cardstock. I really like how the three ornaments cut out using the coordinating die, separating the three strings. Of course I needed some kind of sentiment so I simply used the Joy stamp included in the Whimsical Trees stamp set right on one of the pretty packages.
Step by Step Whimsical Tree card
- Misty Moonlight card base – 5-1/2 x 8-1/2 scored at 4-1/4
- Basic White 4 x 5-1/2 adhered to card base with tape runner.
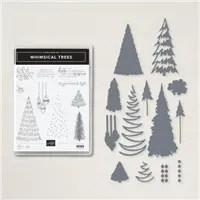
- Cut Tree parts
*Largest tree die from Polished Pink pattern
*Medium tree die from Mint Macaron pattern
*Stamp tree design on Misty Moonlight cardstock with Misty Moonlight Ink and crop with medium tree die
*Cut zig zag overlay using basic white. This die cut will stretch but when scrunched back up it will fit perfectly on the large tree. Adhere with liquid glue for best results.
*Crop medium tree overlay from Mint Macaron cardstock and adhere with liquid glue. - Adhere trees to card front as shown. Use dimensional on Pink and green and tape runner on blue.
- Snip several pretty packages from the Whimsy & Wonder DSP. Stamp Joy in Misty Moonlight on one and add all to the card front with tape runner or dimensional.
- Stamp ornaments in Misty Moonlight on basic white (I prefer Thick for this). Color ornaments with light Misty Moonlight, Mint Macaron and Polished Pink stampin’ blends. Crop with die and adhere to card front with dimensional.
- For the final touch, crop the tiny little ornaments die using Polished Pink cardstock and add to the trees. I used a drop of liquid glue on the tree then picked up the ornament using the sticky end of my Take-You-Pick tool. Easy Peasy.

Thanks for visiting my little portion of the Internet today. Click the button below to shop my online Stampin’ UP! store 24/7. If you have any questions, drop me an email at [email protected].
Buy Awesome StuffHappy Stamping
Lynn
If you enjoyed this post please be sure to…
- Check out my Gallery of Projects for more inspiration
- Save 10% on Product Bundles
- Check out the Clearance Rack and save up to 70%
- The $99 starter Kit is the Best Deal of ALL. Discounts & benefits Here
- Sign up for my Newsletter for information on Sales, classes, and Specials
Current Specials


Adorable card, Lynn! I love all the pretty colors & the trees! It’s a happy card with happy colors! Thanks for sharing.