Now, pomegranates would not be my first choice of fruit for card making, probably not my second, third, fourth, or fifth. However, Stampin’ UP! has created a really sweet pomegranate stamp set that is Free with a $300 order beginning July 1. I couldn’t resist inking it up once my demonstrator pre-order was delivered last week.

Fun Fold cards are, as the name states, fun and this one is no different. It is technically a trifold made from a piece of cardstock 5-1/2″ x 11 and scored at 4-1/4 from one end and 2-3/8 from the other. That allows for coordinating pieces of designer series paper as a background for your favorite image.

Pomegranate image Step by step
- Crop a piece of basic white using the largest square from the Stylish Shapes dies. Stamp the leaf image in the corner using Mossy Meadow.
- Stamp the pomegranate in Merry Merlot on a piece of the new masking paper. I’ve used post-it note paper in the past but this new product is great for creating a mask of larger images or die cuts. Snip out the pomegranate with scissors.
- Stamp the pomegranate as if hanging from the branch. Place your mask over the stamped image and stamp the pomegranate again to the right. This will make the second one look like it is behind the first.
- Stamp your sentiment in Merry Merlot on basic white and crop with dies or scissors. I used the Charming Sentiments and coordinating dies to create mine. Adhere it with dimensionals
- Crop a 3×3 piece of Merry Merlot cardstock and layer behind the focal image with tape runner then set aside.

Card base step by step
- Cut a 5-1/2 x 11 piece of thick basic white cardstock. Score at 4-1/4 from one end and 2-716 from the other. That’s one line short of 2-1/2
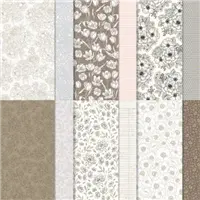
- Adhere a 2-3/8 x 5-3/8 piece of striped designer series paper from Abigail Rose to left front panel using tape runner
- Tape a piece of the new Rustic Harvest DSP sized 4-1/8 x 5-3/8 on the right-side panel. Rustic Harvest is a new paper available on July 1. If you don’t have that paper, there are some similar colored pieces in Awash with Beauty DSP.
- Crop two open leaf dies from Splendid Day – also new – out of Mossy Meadow.
- Place the focal image you set aside onto your card base with dimensional ONLY ON THE LEFT side. You don’t want it to adhere to the right-side panel.
- Tuck in the open leaf die cuts and a open leaf gold trinket under the focal image using glue dots
Thanks for visiting my little portion of the Internet today. Click the button below to shop my online Stampin’ UP! store 24/7. If you have any questions, drop me an email at [email protected].
Buy Awesome StuffHappy Stamping
Lynn
If you enjoyed this post please be sure to…
- Check out my Gallery of Projects for more inspiration
- Save 10% on Product Bundles
- Check out the Clearance Rack and save up to 70%
- The $99 starter Kit is the Best Deal of ALL. Discounts & benefits Here
- Sign up for my Newsletter for information on Sales, classes, and Specials
Current Specials